How to setup VS code editor to work with next.js and supabase edge functions at the same time (Deno support for VS code)
Learn how to work with supabase edge functions & next.js application in the same working directory of VS Code editor using their multiple code workspaces.

You're probably aware of how powerful Supabase edge functions are due to their efficient edge runtime. But the real question is whether these functions are essential for a Next.js application. From my perspective, the answer leans towards yes. Wondering why? Let me explain. There are distinct advantages to using Supabase edge functions over those provided by Next.js.
- Deno Compatibility: Supabase edge functions seamlessly integrate with Deno, a feature absent in Next.js edge functions.
- Integration Capability: Supabase edge functions easily connect with other Supabase services like databases and storage.
- JWT Support: Supabase edge functions support JSON Web Tokens (JWT), enabling straightforward access to user sessions using the Supabase client. Conversely, Next.js edge functions demand additional code for session retrieval, potentially consuming more resources.
Thus, there are compelling reasons to consider employing Supabase edge functions within a Next.js application. While Next.js edge functions offer utility, leveraging Supabase's edge functions, especially in conjunction with Supabase's database, seems advisable, particularly for frequently triggered functions.
Now, let's return to our focus: setting up Supabase edge function within a Next.js workspace. Here's a step-by-step guide:
Prerequisites
- You should have basic understanding of
tsconfig.jsonorjsconfig.json - You should have basic knowledge of visual code settings
- Last but not least, you should have knowledge of typescript
- You have installed deno in your computer 💻 if not then you can install searching on google "install deno for windows/macOS"
Step 1: Initialize Next.js App
Open your working directory in Bash or any terminal of your choice. Then create a brand new next.js web application using this command
npx create-next-app@latestyou can choose default options during initializing or whatever type of configuration you want, In my case I initialize my workspace like this, simply yes to all.
$ npx create-next-app@latest
√ What is your project named? ... next-with-supabase-edge-functions-vscode
√ Would you like to use TypeScript? ... No / (Yes)
√ Would you like to use ESLint? ... No / (Yes)
√ Would you like to use Tailwind CSS? ... No / (Yes)
√ Would you like to use `src/` directory? ... No / (Yes)
√ Would you like to use App Router? (recommended) ... No / (Yes)
√ Would you like to customize the default import alias (@/*)? ... No / (Yes)
√ What import alias would you like configured? ... @/*
Creating a new Next.js app in C:\Users\pc\Desktop\— Next.js\next-with-supabase-edge-functions-vscode.

Using npm.

Initializing project with template: app-tw


Installing dependencies:
- react
- react-dom
- next

Installing devDependencies:
- typescript
- @types/node
- @types/react
- @types/react-dom
- autoprefixer
- postcss
- tailwindcss
- eslint
- eslint-config-next


added 361 packages, and audited 362 packages in 1m

128 packages are looking for funding
  run `npm fund` for details

found 0 vulnerabilities
Initialized a git repository.

Success! Created next-with-supabase-edge-functions-vscode
Step 2: Initialize supabase in Next.js app
To initialize the supabase in next.js you need to install supabase package 📦 you can use this command
npm install --save supabaseyou can also install supabase as a global package using npm i -g supabase but I recommend you to not do this as it is not a good practiceAfter installing supabase package 📦 as a save dependency run npx supabase init in the root folder 📂 and then simply say y
Then the response should be like this
$ npx supabase init
Generate VS Code settings for Deno? [y/N] y
Generated VS Code settings in .vscode\settings.json. Please install the recommended extension!
Finished supabase init.
This will create a supabase folder with some supabase related files and .vscode/settings.json file which should look like this
{
  "deno.enablePaths": [
    "supabase/functions"
  ],
  "deno.lint": true,
  "deno.unstable": true,
  "[typescript]": {
    "editor.defaultFormatter": "denoland.vscode-deno"
  }
}
but at this point you might be getting a warning ⚠ in the .vscode/settings.json.
It is because you have not installed deno extension in visual studio code so to remove this warning simply install deno extension in your visual studio code by searching denoland.vscode-deno this will show you only the real deno extension So you can simply install.
After installing note that the error is gone in the .vscode/settings.json file.
Step 3: Create supabase edge function in next.js
To create a edge function you need to run this command in terminal
npx supabase functions new [name of function]This command will create a new folder with the name of function under your supabase folder and in this function folder you have another folder with the name that you have provided in your command
in my case I created a new function with hello-world name So, I got this in my terminal
npx supabase functions new hello-world
Created new Function at supabase\functions\hello-world
now you have setup the edge functions with next.js and in the development it may be working fine as you expected right.
But there is a catch! in the development mode your developing and coding experience should be working fine as you expected but you also need to deploy you site to the internet therefore you have to create a production build using this command
npm run buildAfter running this command you are now getting build errors in linting and checking validity of types step because of deno in next,js right
So how do we can fix this next.js build error created by deno? well we have to options to remove this error.
Option 1 - create a .vercelignore file to ignore the supabase folder on runtime.
you can do this by creating a .vercelignore file in the root of workspace and then write
./supabaseNote that this will only work during vercel build but for the local build this file will not work
Option 2 - Go to your tsconfig.json or jsconfig.json file then add ./supabase/functions in the exclude array
Here an example
{
  "compilerOptions": {
    "target": "es5",
    "lib": ["dom", "dom.iterable", "esnext"],
    "allowJs": true,
    "skipLibCheck": true,
    "strict": true,
    "noEmit": true,
    "esModuleInterop": true,
    "module": "esnext",
    "moduleResolution": "bundler",
    "resolveJsonModule": true,
    "isolatedModules": true,
    "jsx": "preserve",
    "incremental": true,
    "plugins": [
      {
        "name": "next"
      }
    ],
    "paths": {
      "@/*": ["./src/*"]
    }
  },
  "include": ["next-env.d.ts", "**/*.ts", "**/*.tsx", ".next/types/**/*.ts"],
  "exclude": ["node_modules", "./supabase/functions"] // By adding "./supabase/functions" next.js will not include this during build
}
🎊🙌 congratulations now you have successfully setup the supabase edge function with in next.js app router and you don't have to create another repo for edge functions separately
Additionally you can also create multiple workspaces in vs code by creating my-workspace.code-workspace file in the root and then simply paste this code in file
{
    "folders": [
      {
        "name": "project-root",
        "path": "./"
      },
      {
        "name": "supabase-functions",
        "path": "supabase/functions"
      }
    ],
    "settings": {
      "files.exclude": {
        "node_modules/": true,
        "supabase/functions/": true
      },
      "deno.enablePaths": [
        "supabase/functions"
      ],
      "deno.lint": true,
      "deno.unstable": true,
      "[typescript]": {
        "editor.defaultFormatter": "denoland.vscode-deno"
      },
      "deno.importMap": "./supabase/functions/import_map.json", // (optional) if you have any import map
      "typescript.tsdk": "project-root\\node_modules\\typescript\\lib" // this line is optional but recommended
    }
  }
💡 You can give any name to the.code-workspacefile in my case I give name isworkspace.code-workspace
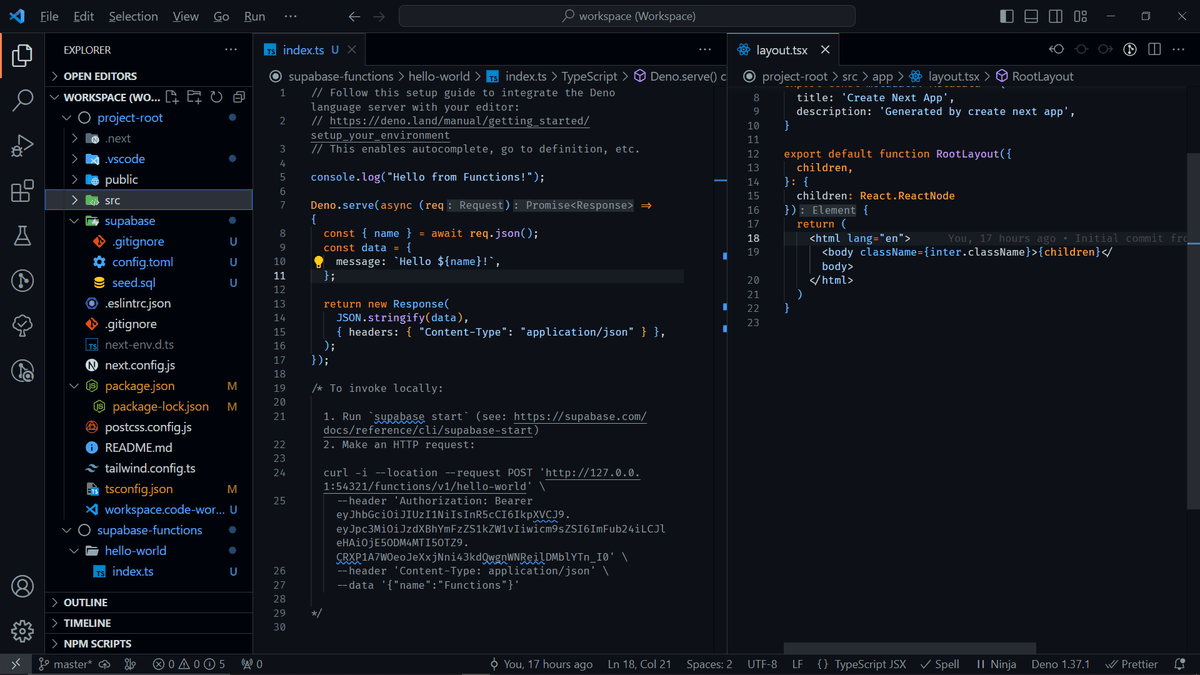
Look at this now you have completely setup both deno edge function and next.js workspace together
🌟 Complete git repository available (complete example with code for setup supabase edge function in next.js workspace for visual studio code)


